Notice

Please Note - we advise using google chrome browser when editing this theme in the weebly dashboard

you can download the chrome browser from here - Download Chrome

Parallax - Weebly Theme Instructions

Contents

1. Introduction
2. Getting Started
3. Menu
4. Header and Parallax Images
5. Fonts and Colors
6. Portfolio Section
7. Icons
8. Custom HTML Widgets

Thank you for purchasing Parallax - a one page Weebly Theme designed by WebfireThemes.com.

This theme has been designed using Webfire Theme's new Design platform and includes great features to help you build a professional website easily, quickly and with great results.

This theme comes with the option to purchase with Content Ready page layout. These are pre-designed page layouts with a mixture of drag and drop areas and hard-coded content areas which can be edited simply by clicking and entering the content you want.

In the theme, we have also included all instructions as helper boxes which are visible via the weebly editor.

CONFIG and LIVE Page Layouts

Each Page Layout (with the exception of "coming-soon") has two variations:

Config - for building and configuring the page in the weebly dashboard
Live - for the live version published to the web
Whichever page layout you decide to use for your website, you should select the *-config version first. Build your site using the config variation of the page layout.
This includes all the helper boxes. Once you've created your website and are ready to put it live you should switch your page layout to *-live.
This will remove the helper boxes for your published website (The reason this is important is because google still reads the content on the helper boxes,
which is BAD for SEO (Search Engine Optimisation).
If you need to make further changes to your site, and need the helper boxes to appear again, simply change your page back to *-config to make the changes

The page layouts available are as below:
1. "Coming-soon.html" - This page can be used as a landing page for your website while it is under construction.
2a. "cr-home-noslider-config.html" - This is the Content Ready Homepage (without slider). Use the *-config.html version to build the site.
2b. "cr-home-noslider-live.html" - Once you have built the site, point the page to the *-live.html version and publish to make live.
3a. "cr-home-slider-config.html" - This is the Content Ready Homepage (with slider). Use the *.config.html version to build the site.
3b. "cr-home-slider-live.html" - Once you have built the site, point the page to the *-live.html version and publish to make live.
4a. "home-noslider-config.html" - This is the Standard Homepage (without slider). Use the *-config.html version to build the site.
4b. "home-noslider-live.html" - Once you have build the site, point the page to the *-live.html version and publish to make live.
5a. "home-slider-config.html" - This is the Standard Homepage (with slider). Use the *-config.html version to build the site.
5b. "home-slider-live.html" - Once you have build the site, point the page to the *-live.html version and publish to make live.
6a. "standard-config.html" - This is the Standard external page. Use the *-config.html version to build the page.
6b. "standard-live.html" - Once you have build the page, point it to the *-live.html version and publish to make live.
Before you make a start, you'll notice the homepage is set to be this instructions file. We recommend the first step you take is to create a new page for "instructions" and associate it to the index.html page layout. This way you will be able to refer back to this instruction file whenever you need to without keeping it as the homepage. Alternatively you can copy and paste the contents of this page into a word document and refer back to that. To setup the page like we recommend do this:
1. Click on pages > ADD > Standard Page
2. Name the page Instructions
3. Ensure the Index.html page layout is selected.
4. Change the Home page to the page layout you want to use.
5. Click Save and Edit.
Now you can set your homepage to use your preffered page layout.

The Parallax menu has been made easy to setup by using click to edit menu items.
Once you have set your homepage to be the page layout you want, you will see the menu helper at the top of the screen.
simply click on the "click here to edit" buttons for each of the associated menu items and type in what you want to appear here.
The last two menu items are for "external" pages. This basically means pages on your site that direct the visitor away from the one page homepage.
By default, these are setup for pages called "about" and "contact". This is only because on any new weebly site these two pages are setup when you create the site.
If you want the links to take you to different pages you need to take the following steps.
1. Create two new pages via the weebly page sectoin (EG: Extras and info
2. Open the page layout you are using: (design > edit CSS/HTML > page layouts)
3. Search for (CTRL+F) href="/about.html"
4. Replace the page names for the 7th and 8th menu to link to the new pages you created:
<li><a class="external" href="/extras.html"></a></li>
<li><a class="external" href="/info.html"></a></li>

Section Names
Each menu item relates to a section on the homepage. the sections are named as follows:
#home
#tab1
#tab2
#tab3
#tab4
#portfolio
#tab6
Each of these can be used to reference as the "url" when using a scroll button. EG: href="/#tab4"

Header images (cr-home-noslider-config.html and home-noslider-drag.html only)

If you're using the "cr-home-noslider-config.html" or "home-noslider-drag.html" page layouts you can change the header image by taking the following steps:
1. ensure the image you want to use is 1920x800 px (or larger, however the page will automatically rescale the image)
2. Rename the image to "header.jpg"
3. Replace the existing "header.jpg" file via weebly's designer section (DESIGN > edit CSS/HTML > files > add new file(s))

Slider Images
1. As with the instructions above, make sure the images are 1920x800 px and named "slide1.jpg, slide2.jpg, slide3.jpg"
2. Replace the existing slide1.jpg, slide2.jpg and slide3.jpg with your images via the add new file(s) section (as per instructions above)

Parallax Images
To change the parallax image, follow the same steps as for slider images. the only difference being you need to rename the files "bg1.jpg, bg2.jpg"


Changing the parallax image overlay
1. open the main-style.css file (DESIGN > Edit CSS/HTML > main-style.css)
2. Search for (CTRL+F) for PARALLAX OVERLAY
3. On the line below you wil see this code: .pattern{background-color:rgba(44,62,80,0.9)}
4. To change the color simply change the RGB code (EG: .pattern{background-color:rgba(33,25,19,0.9)}
5. The "0.9" is the opacity - we don't recommend you change this, however if you want to play around just change it to a decimal point between 0 and 1
You can find the hex color codes at this website http://www.w3schools.com/tags/ref_colorpicker.asp

Changing the drop shadow on the titles
Follow the same instructions as above, however change this line of code (directly underneath the code you changed for the image overlay
#slidecaption .sub-caption, .banner{text-shadow:2px 2px rgba(44, 62, 80, 0.9)}
Adding the Youtube Video Background
Just above the Portfolio section you will see a grey empty section, simply drag over the weebly You Tube widget, dont worry! the widget is not deisgned to be full width in the weebly dashboard but will be full width on the live website

We have laid out the main-style.css file in a way that makes changing the fonts and colors easy. Please follow the instructions below to make changes as you require.

Fonts
PLEASE NOTE: Because this is a custom theme, we don't advise using the Weebly Font size changer to make the font size larger/smaller. Although this
will appear to work, and most of the time will, certain sections may become out of line if using this. We would advise adding in the text via the Custom HTML drag and drop
widget if you want to use a different size to the default.

1. Go to "DESIGN > EDIT CSS/HTML > main-style.css"
2. Scroll down to line 59
3. From line 59 and onwards you will see all the font sizes and styles of the theme. Each has a comment above it to describe what it relates to.
4. When you have found the part of the CSS you want to change, update it accordingly with the font size/style you wish to use.
EG 1 - (To Change the font size of H1) - change from:
h1{font-size:40px} TO h1{font-size:50px}
EG 2 - (To change the font of the Navigation Menu) - Change from:
.menu ul li a &123;font-family:Montserrat,'Trebuchet MS',sans-serif;font-size: 13px;font-weight: 700;text-transform: uppercase;}
TO
.menu ul li a &123;font-family:"Times New Roman", Times, serif;font-size: 13px;font-weight: 700;text-transform: uppercase;}
Colors
1. Go to "DESIGN > EDIT CSS/HTML > main-style.css"
2. Scroll down to line 589
3. Each of the colors are grouped by category (EG: Accordion, Header, Footer etc) and comments are above different sections to describe what they are
4. To change any of the colors, find the color you want to change and replace with the color you want. Hex Colors should be used where possible.
EG: To change the color of the mobile toggle button, change the code from:
.toggle:after{color:#E56C69} TO .toggle:after{color:#FFFF00}
in the html page layout where the code is placed for the portfolio widget there is a section that defines the names of each filter. and in each of the image placeholders in the html, there is somewhere to define which filter to use.

EG:
This code is where you set the names of your filters (see bold). you can call this whatever you wish EG: "filter1", "filter2", "filter3"

<!-- portfolio starts here -->
<!-- Portfolio Filter -->
<ul class="option-set" data-option-key="filter">
<li><a class="selected" href="#filter" data-option-
value="*"><span></span>All</a></li>
<li><a href="#filter" data-option-value=".site"><span></span>
{porttitle2:text}</a></li>
<li><a href="#filter" data-option-value=".app"><span></span>
{porttitle3:text}</a></li>
<li><a href="#filter" data-option-value=".campaign"><span></span>
{porttitle4:text}</a></li>
<li><a href="#filter" data-option-value=".strategy"><span></span>
{porttitle5:text}</a></li>
</ul>
<!-- End Filters -->


Then, on each of the portfolio items, you state what filter you want the portfolio item to use for each image (TIP: you can use as many of the filters as you like, just seperate with a space)

In the portolio item below for instance I'm using the "site" and "app" filter (see bold)

<!-- Portfolio Items -->
<div id="posts" class="row isotope">
<!-- Start Project -->
<div class="post item span4 isotope-item site app">
<div class="profile-photo">{folio1:content}</div>
</div>
<!-- End Project -->


And in the next project i'm using just the strategy filter

<!-- Start Project -->
<div class="post item span4 isotope-item strategy">
<div class="profile-photo">{folio2:content}</div>
</div>
<!-- End Project -->


In this one i'm using app, campain and strategy

<!-- Start Project -->
<div class="post item span4 isotope-item app campaign strategy">
<div class="profile-photo">{folio3:content}</div>
</div>
<!-- End Project -->


so all you should need to do is tweak the existing code. you shouldn't need to add any new code in, unless you wanted more items to appear.

this theme makes the most of two sets of icons. Icons can be used in text or in many of the widgets.
There is no way to integrate these icons directly with the weebly dashboard so you do need to change these manually in the code. The instructions in this file clearly show you where to change the code.

Font Awesome Icons
You can find the list of icons and their codes here: http://wft-parallax.weebly.com/features.html
Wherever there is a widget being used that includes an icon, you will see a line of code that looks like this: <i class="fa fa-twitter"></i>
To change the icon just replace the code for that icon. EG: <i class="fa fa-facebook"></i>

On any Drag and Drop content area we have included html code below that can be inserted into the Embed Custom Code element via the weebly dashboard. Simply copy and paste the code below to insert the widget via the drag and drop section.
The text that is BOLD in the code below is where you insert your own text after copying and pasting.
Anywhere you see this *LINK* should be replaced with a link. EG: <a href="*link*"> would be replaced with <a href="http://www.google.com">
To see the widgets in action, take a look at our demo page http://wft-parallax.weebly.com
EMPTY SPACE DIVIDER 10px margin
<div class="divider-empty marg-10"></div>

EMPTY SPACE DIVIDER 20px margin
<div class="divider-empty marg-20"></div>

EMPTY SPACE DIVIDER 30px margin
<div class="divider-empty marg-30"></div>

EMPTY SPACE DIVIDER 40px margin
<div class="divider-empty marg-40"></div>

EMPTY SPACE DIVIDER 50px margin
<div class="divider-empty marg-50"></div>

EMPTY SPACE DIVIDER 60px margin
<div class="divider-empty marg-60"></div>

EMPTY SPACE DIVIDER 70px margin
<div class="divider-empty marg-70"></div>
<section class="widget">
<ul class="subnav-widget">
<li><a href="http://????">
<i class="fa fa-comments-alt"></i>About</a></li>
<li><a href="http://????">
<i class="fa fa-code"></i>Services</a></li>
<li><a href="http://????">
<i class="fa fa-pencil"></i>Testimonials</a></li>
<li><a href="http://????">
<i class="fa fa-off"></i>Pricing Tables</a></li>
<li><a href="http://????">
<i class="fa fa-credit-card"></i>FAQ's</a></li>
<li><a href="http://????">
<i class="fa fa-bullhorn"></i>404 Error Page</a></li> </ul> </section>
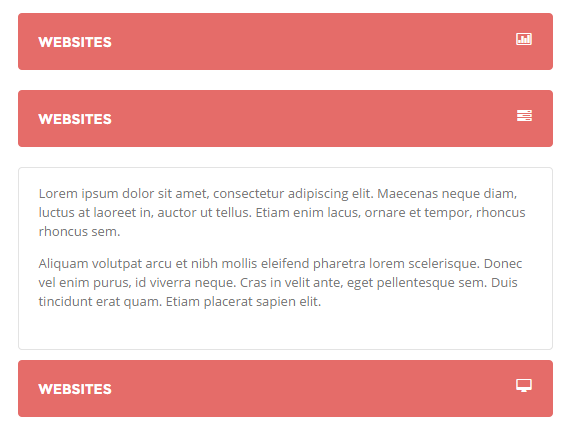
<div class="accordion">
<div class="accordion-wrp">
<h6>**TITLE 1**<i class="fa fa-globe"></i></h6>
<div class="accordion-content">
<p>**PARAGRAPH 1**</p>
<p>**PARAGRAPH 2**</p>
</div></div>
<div class="accordion-wrp">
<h6>**TITLE 2**<i class="fa fa-tasks"></i></h6>
<div class="accordion-content">
<p>**PARAGRAPH 1**</p>
<p>**PARAGRAPH 2**</p>
</div></div>
<div class="accordion-wrp">
<h6>**TITLE 3**<i class="fa fa-desktop"></i></h6>
<div class="accordion-content">
<p>**PARAGRAPH 1**</p>
<p>**PARAGRAPH 2**</p>
</div></div></div>
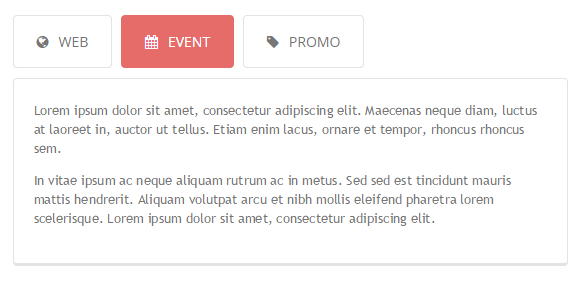
<div class="tabs">
<ul>
<li id="tab01" class="current"><i class="fa fa-globe"></i>**TAB 1 TITLE**</li>
<li id="tab02"><i class="fa fa-calendar"></i>**TAB 2 TITLE**</li>
<li id="tab03"><i class="fa fa-tag"></i>**TAB 3 TITLE**</li>
</ul>
<div class="tab-content-wrp">
<div id="tab01-content" class="tab-content active">
<p>**PARAGRAPH 1**</p>
<p>**PARAGRAPH 2**</p>
</div>
<div id="tab02-content" class="tab-content">
<p>**PARAGRAPH 1**</p>
<p>**PARAGRAPH 2**</p>
</div>
<div id="tab03-content" class="tab-content">
<p>**PARAGRAPH 1**</p>
<p>**PARAGRAPH 2**</p>
</div></div></div>
<section class="head-title"> <h1>**TITLE HERE**</h1> <h5>**SUBTITLE HERE**</h5> </section>

TITLE WIDGET

Lorem ipsum dolor sit amet, consectetuer adipiscing elit, agna aliquam erat volutpat. Ut wisi enim ad minim veniam.

<div class="profile">
<img src="/files/theme/profile1.jpg" alt="">
<div class="profile-name">**NAME**</div>
<div class="profile-job">**JOB TITLE**</div>
<div class="profile-desc">
<p>**JOB DESC**</p>
</div>
<ul class="profile-social-icons">
<li><a href="#"><i class="fa fa-twitter"></i></a></li>
<li><a href="#"><i class="fa fa-facebook"></i></a></li>
<li><a href="#"><i class="fa fa-dropbox"></i></a></li>
<li><a href="#"><i class="fa fa-pinterest"></i></a></li>
<li><a href="#"><i class="fa fa-skype"></i></a></li>
<li><a href="#"><i class="fa fa-linkedin"></i></a></li>
<li><a href="#"><i class="fa fa-instagram"></i></a></li>
<li><a href="#"><i class="fa fa-google-plus"></i></a></li>
<li><a href="#"><i class="fa fa-youtube"></i></a></li>
</ul></div>
Michael Goltsman
Chief Executive Officer

Lorem ipsum dolor sit amet, adipiscing elit. Maecenas neque diam, luctus at laoreet in.


<div class="block center-text">
<div class="block-wrapper">
<div class="block-inner">
<i class="fa fa-file fa-big"></i>
</div></div>
<h3>**TITLE**</h3>
<p>**PARAGRAPH**</p>
<a href="#portfolio" class="wsite-button wsite-button-normal scroll-link">
<span class="wsite-button-inner">**BUTTON TEXT**</span></a>
</div>

design is passion

This is Photoshop's version of Lorem Ipsum.
Proin gravida nibh vel velit auctor aliquet.
Aenean sollicitudin, lorem qvuis bibendum
auctor, nisi elit consequat ipsum.
Nec sagittis sem nibh id elit.

Portfolio

<div class="info-block black-bg">
<div class="span11">
<div class="ib-text">
<h4>**TITLE**</h4>
<p>**PARAGRAPH**</p>
</div>
<a class="wsite-button wsite-button-large wsite-button-normal external-link" href="insert button link">
<span class="wsite-button-inner">**BUTTON TEXT**</span></a>
</div></div>

Lorem ipsum dolor sit amet, consectetur adipiscing elit.

Aliquam volutpat arcu et nibh mollis eleifend pharetra lorem scelerisque.

Submit
<article class="title-block black-bg">
<h3 class="inner-heading">**TITLE**</h3>
<p>
**PARAGRAPH 1**
<br>
**PARAGRAPH 2**
</p>
</article>

Sub Heading

Lorem ipsum dolor sit amet, consectetur adipiscing. Ut eu semper turpis. In gravida leo laoreet magna blandits.
Lorem ipsum dolor sit amet, consectetur adipiscing. Ut eu semper turpis. In gravida leo laoreet magna blandit.

<article class="title-block red-bg">
<h3 class="inner-heading">**TITLE**</h3>
<p>
**PARAGRAPH 1**
<br>
**PARAGRAPH 2**
</p>
</article>

Sub Heading

Lorem ipsum dolor sit amet, consectetur adipiscing. Ut eu semper turpis. In gravida leo laoreet magna blandits.
Lorem ipsum dolor sit amet, consectetur adipiscing. Ut eu semper turpis. In gravida leo laoreet magna blandit.

<a href="#tab6" class="wsite-button wsite-button-normal scroll-link"> <span class="wsite-button-inner">Contact Us</span> </a> Contact Us
<a href="#tab6" class="wsite-button wsite-button-large scroll-link"> <span class="wsite-button-inner">Contact Us</span> </a> Contact Us
<<a href="#tab6" class="wsite-button wsite-button-small wsite-button-highlight scroll-link"> <span class="wsite-button-inner">Contact Us</span> </a> Contact Us
<a href="#tab6" class="wsite-button wsite-button-large wsite-button-highlight scroll-link"> <span class="wsite-button-inner">Contact Us</span> </a> Contact Us
<a href="insert a link" class="wsite-button wsite-button-normal external-link"> <span class="wsite-button-inner">External</span> </a> External
<a href="insert a link" class="wsite-button wsite-button-large external-link"> <span class="wsite-button-inner">External</span> </a> External
<a href="insert a link" class="wsite-button wsite-button-normal wsite-button-highlight external-link"> <span class="wsite-button-inner">External</span> </a> External
<a href="insert a link" class="wsite-button wsite-button-large wsite-button-highlight external-link"> <span class="wsite-button-inner">External</span> </a> External
<div class="pricing-column pricing-column-first">
<div class="pricing-header">
<div class="pricing-title black-bg">**Title**</div>
<div class="price">
<sup>$</sup>
<span>19</span>/Monthly</div>
</div>
<ul class="features">
<li><p>**FEATURE**</p></li>
</ul>
<div class="pricing-footer">
<a class="wsite-button external-link" href="#">
<span class="wsite-button-inner">Purchase</span></a>
<p class="footer-space"></p>
</div>
</div>
Basic
$ 19/Monthly
  • 100 Email Accounts

  • 100GB Space

  • 1 Domain Name

  • 1TB Bandwidth

<div class="pricing-column pricing-column-first">
<div class="pricing-header">
<div class="pricing-title red-bg">**Title**</div>
<div class="price">
<sup>$</sup>
<span>19</span>/Monthly</div>
</div>
<ul class="features">
<li><p>**FEATURE**</p></li>
</ul>
<div class="pricing-footer">
<a class="wsite-button external-link" href="#">
<span class="wsite-button-inner">Purchase</span></a>
<p class="footer-space"></p>
</div>
</div>
Premium
$ 39/Monthly
  • 300 Email Accounts

  • 900GB Space

  • 3 Domain Name

  • 1TB Bandwidth

<div class="tag-cloud">
<a class="tag-link" href="http://YOURSITE.COM/PAGE">Contact</a>
<a class="tag-link" href="http://YOURSITE.COM/PAGE">Tabs</a>
<a class="tag-link" href="http://YOURSITE.COM/PAGE">Toggles</a>
<a class="tag-link" href="http://YOURSITE.COM/PAGE">Buttons</a>
<a class="tag-link" href="http://YOURSITE.COM/PAGE">Lists</a>
<a class="tag-link" href="http://YOURSITE.COM/PAGE">Typography</a>
<a class="tag-link" href="http://YOURSITE.COM/PAGE">Dropcaps</a>
<a class="tag-link" href="http://YOURSITE.COM/PAGE">Quotes</a>
<a class="tag-link" href="http://YOURSITE.COM/PAGE">Boxes</a>
</div>
<ul class="contact-info"> <li><p><i class="fa fa-map-marker">
</i>Fort Knox, Kentucky south Louisville, Elizabethtown.<</p></li>
<li><p><i class="fa fa-phone">
</i>0445 566 65 970</p></li>
<li><p><i class="fa fa-envelope"></i>
<a href="mailto:support@webfirethemes.com">support@webfirethemes.com</a>
</p></li></ul>


Contact widget in footer
To acheive the demo contact area add these three codes into 3 weebly column dividers

column 1
<ul class="contact-info">
<li><i class="fa fa-map-marker"></i>**ADDRESS**</li>
</ul>

column 2
<ul class="contact-info"> <li><i class="fa fa-phone"></i>**TELEPHONE NUMBER**</li> </ul>
column 3
<ul class="contact-info"> <li><i class="fa fa-envelope"></i><a href="**EMAIL ADDRESS**">**EMAIL ADDRESS**</a></li> </ul>
  • Fort Knox, Kentucky south Louisville, Elizabethtown.
  • 0445 566 65 970
Propack Kenya Limited | Presenting Great Products